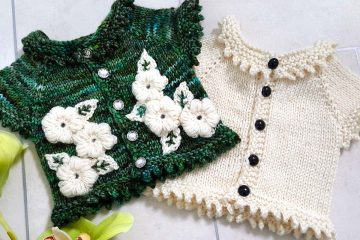
While writing up the Simon’s Jumper pattern one row was particularly difficult to articulate. This is the row where you transition from knitting flat, to knitting in the round.
You’ve probably read the row a thousand times. And it still reads like gobbledygook. Sorry about that. In reality, it’s surprisingly simple to knit.
So to aid those knitting the pattern, I’ve created this step-by-step tutorial to get you through it.
First, start the row as you have been doing already. Remember its an increase row. But….

….stop when you get to the last marker.

Without twisting the stitches, slip the marker and the last four stitches over to the right hand needle.

Next you’ll need a spare needle. Keen eyes will notice my spare needle in the example is a little larger (sssh!).

Again without twisting, slip the four stitches on to the spare needle.

Spread the stitches on the circular needle round.

Bring the circular needle around behind the spare needle.

Slip the right hand needle through the front of the first stitch on the spare needle and then the front of the first stitch on the circular needle.

Knit these two stitches together.

You should now have three stitches remaining on the left hand needle and three stitches remaining on the spare needle. The two stitches you just knitted should now be one stitch on the right hand needle.

Knit the next two stitches together, one from the spare needle and one from the left hand needle…

…and again…

…and again.

Your knitting should now look like this with all eight stitches that were on the he left hand and spare needles turned into four stitches on the right hand needle.

The plain garter band should be at the back…

…and the buttonhole garter band at the front. Make sure you keep the stitch marker after the button band – this is the start of your round.

And that’s all there is to that confusing row. It’s not so scary after all, it’s just not an easy instruction to convey with just words.
I hope you enjoy knitting the rest of your jumper, and most of all I hope the recipient loves it.


1 Comment
Kerry Wallis · 5th February 2019 at 10:58 pm
Thanks so much for sharing this lovely pattern and sharing this technique. For those who struggle with multiple needles (though your pictures do show that it’s not that hard), I hope you don’t mind if I share my lazy-butt method of handling this kind of join. Once I get to the (in this case) last 4 stitches of the round where I am about to join, I actually slip the first 4 stitches of that row (other end of the circular needle) onto the spare needle. I then re-thread those 8 stitches (4 from the beginning of the row and 4 as yet unit from the end of the row) onto the left hand needle, alternating them (one from the spare needle, one from the right) till all 8 are back on the left needle. Then, using just two needles I simply k2tog four times (each k2tog will consist of one stitch from each end of the work), giving the same effect. It just feels “safer” to me as I am notorious for not being able to keep all stitches on the left needles until I want to knit them when doing a 3-needle bind off, or even for dropping the spare needle out of my stitches. Please understand I’m not saying my way is better, but if anyone is struggling with 3 needles (and some people do) this might be an alternative method for them to try – but feel free to delete my message if you think this will just confuse things.
I can’t wait to cast this one on and as I have no little children in my life at the moment, this would be a perfect little “refugee knit”.